
Assigning a plan
A plan with content in it teaches nobody until somebody is in it. This is the step that connects the two: you add people to the plan, and Knowspread assigns its content to them.
You need a plan that already holds at least one course — if yours is empty, start with building a plan — and permission to manage that plan.
1. Open the picker and choose people
Section titled “1. Open the picker and choose people”Open Studijní plány, select your plan and stay on its Uživatelé tab. An empty plan offers PŘIDAT STUDENTY in the middle of the page; once people are in it, the same thing lives in the person-with-plus icon above the table.
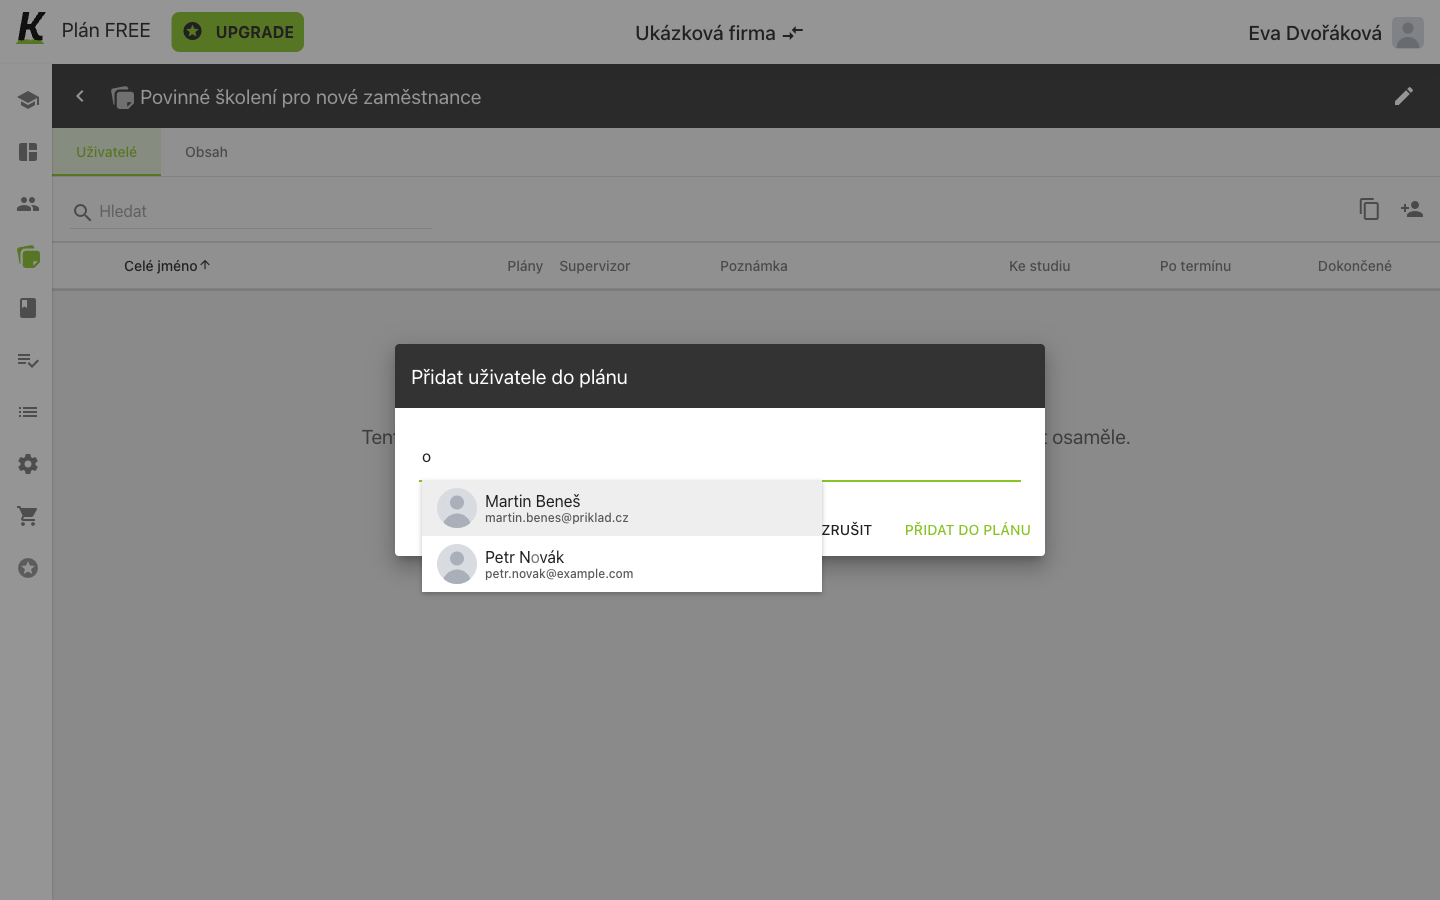
- Hledat uživatele v organizaci (1) searches the people the space already has. It matches on the name and on the address, anywhere in either.
- Each match shows a name above its address (2), which is how you tell two namesakes apart. Pick as many as you need before saving.
- PŘIDAT DO PLÁNU (3) adds them. ZRUŠIT closes the dialog and changes nothing.
The dialog also offers Přidat nového uživatele, so somebody who is not in the space yet can be invited from here rather than from the user list.
A person who was invited and has not accepted yet can still be added. They appear in the plan, greyed, with an envelope marker on their row.
2. Read the message, because the work is not instant
Section titled “2. Read the message, because the work is not instant”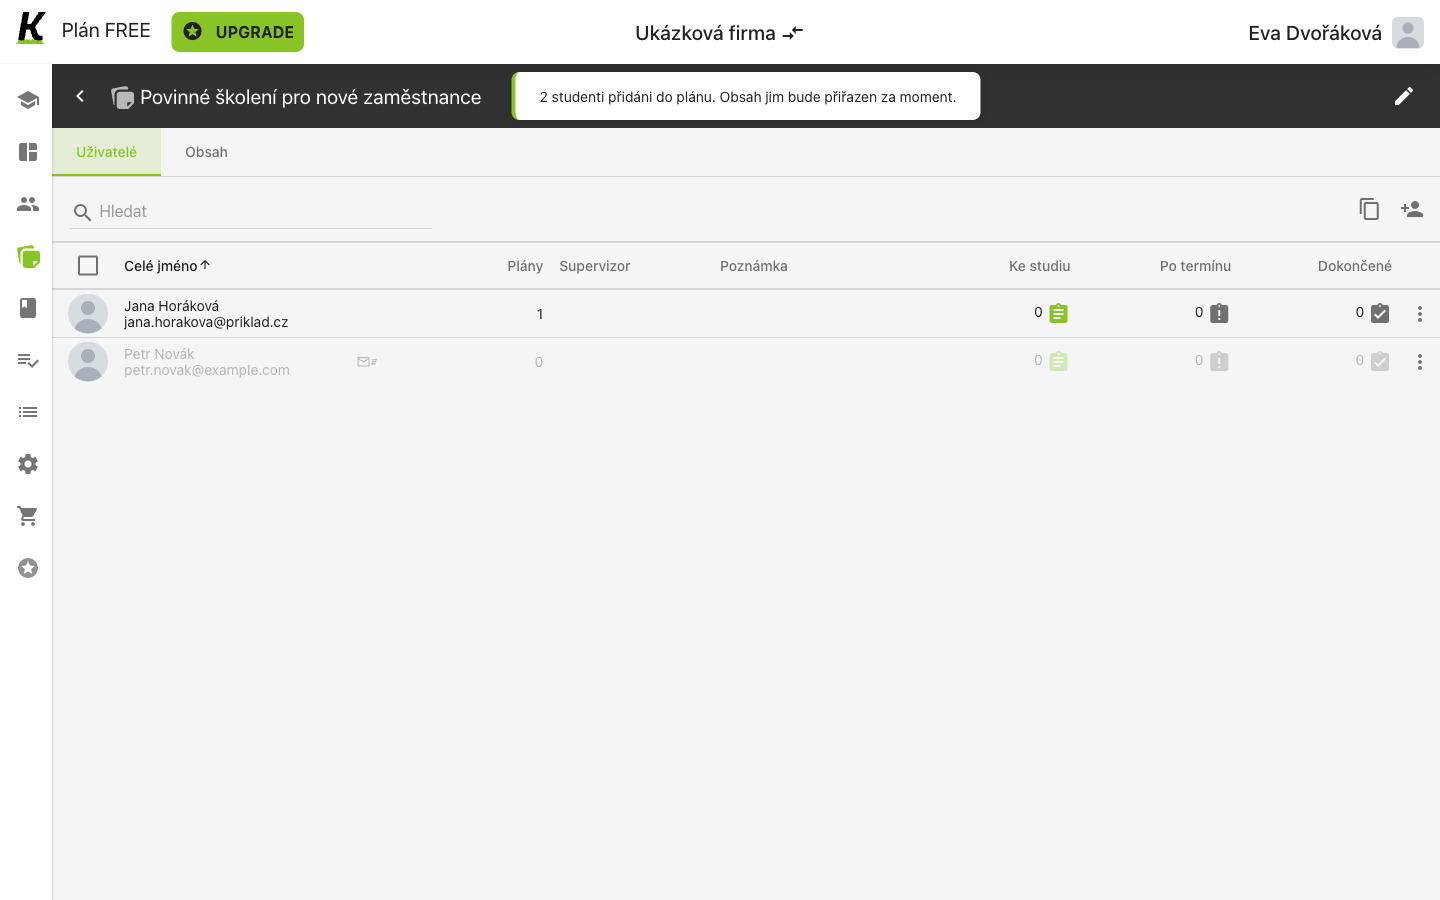
The confirmation says 2 studenti přidáni do plánu. Obsah jim bude přiřazen za moment — added now, content assigned shortly. In this capture every counter still reads 0 because the assignment had not run yet.
This is worth knowing before you go looking for a mistake: a plan that shows people with nothing to study, seconds after you added them, is not broken.
3. Check the settled counters
Section titled “3. Check the settled counters”Reload the page and read the row again.
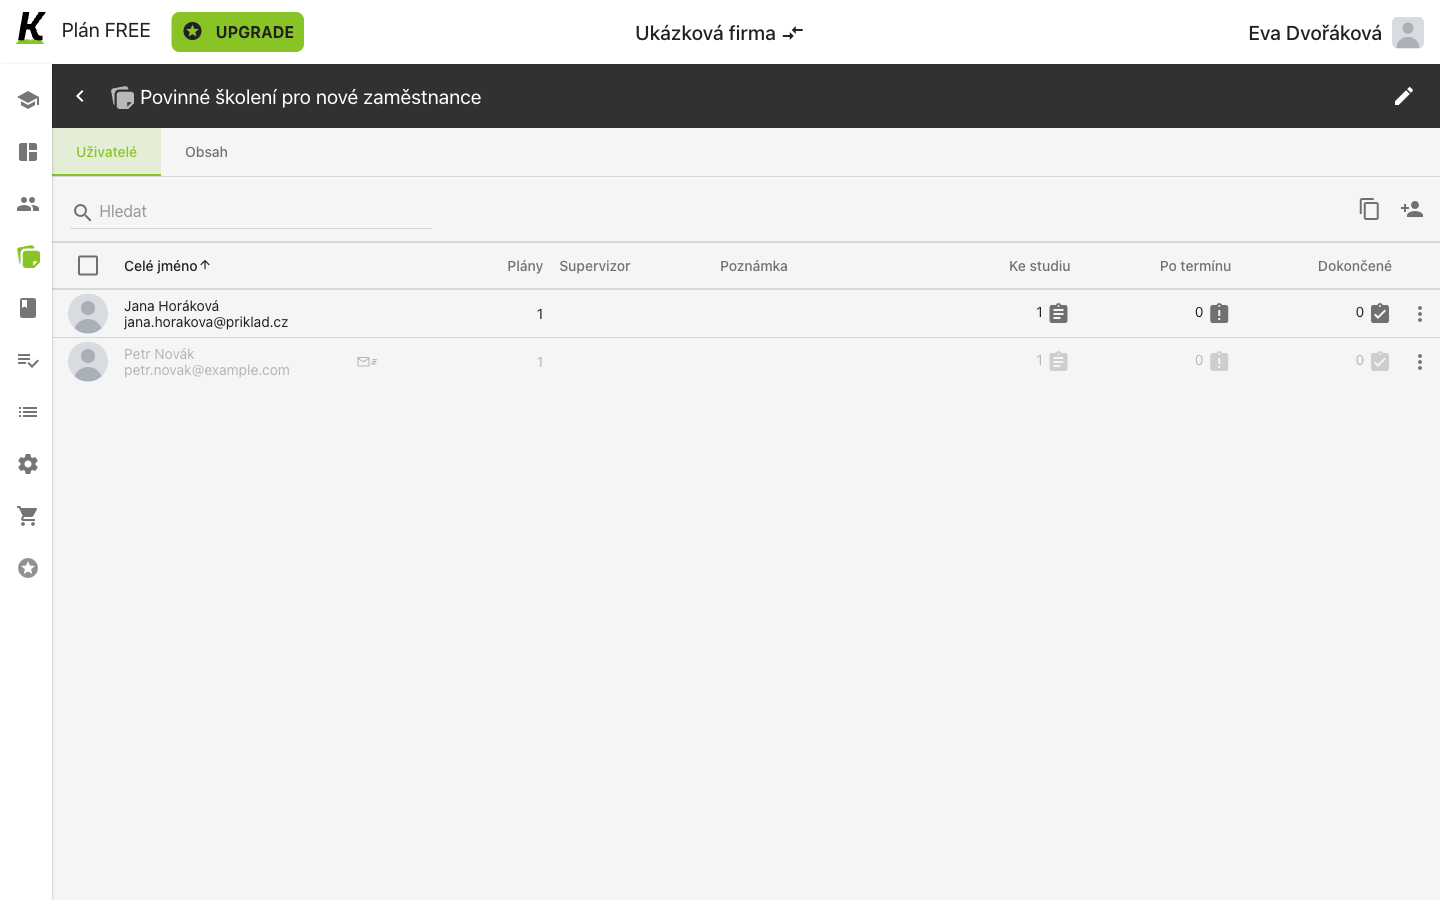
- The first row is a person with an account (1).
- The second is greyed, with an envelope marker (2) — invited, not joined.
- Ke studiu now reads 1 for both (3): one thing waiting to be studied, which is the course the plan holds.
- Plány reads 1 (4). It was 0 for the invited person in the previous screenshot, so this column moves with the assignment, not with the moment of adding.
The assignment reaches the learner with no further action from you. Nothing has to be sent, activated or confirmed: the next journey opens the same account’s own Studium and the course is sitting there.
Questions about this step
Section titled “Questions about this step”Can I add somebody who has not accepted their invitation? Yes, and this capture does. Whether such a person can then study is not tested here — they cannot sign in until they accept, and this run had no mailbox to accept from.
Why does the person picker read out a lot of technical text? The autocomplete keeps a hidden region for screen readers that prints the whole user record — including the e-mail address, the photo URL and internal identifiers. It is invisible on screen, but a screen reader reads it aloud. Reported as a product defect; nothing you can do about it from here.
Next: going through a course, which is the same events seen from the learner’s side. For the plan screen itself, see study plans.