
Starting a space
Every other journey starts from a space that already exists. This one makes it. Three screens, one sitting, and at the end you have somewhere to invite people to.
1. Open the form
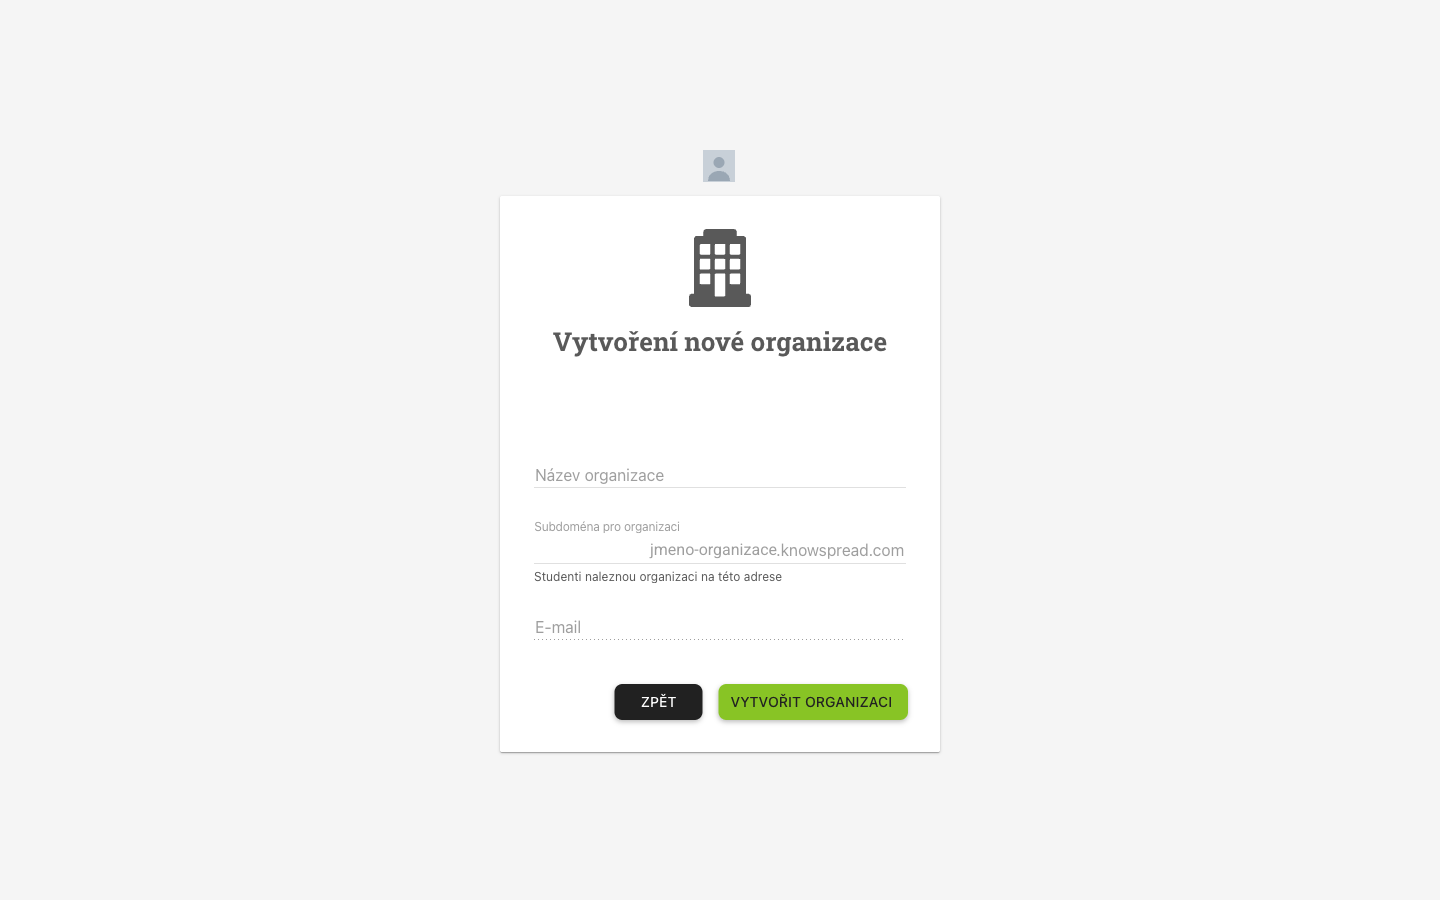
Section titled “1. Open the form”Organisation settings cannot make a space — the form lives in the profile menu, under Vytvořit organizaci.
123
- Název organizace is what people will see in the top bar (1).
- Subdoména is the harder choice (2). It becomes the address, so it is what people type to reach you, and the note under the field says as much.
- Vytvořit organizaci is disabled until all three fields are filled (3). The third is your own e-mail, filled in for you.
2. Name it and choose the address
Section titled “2. Name it and choose the address”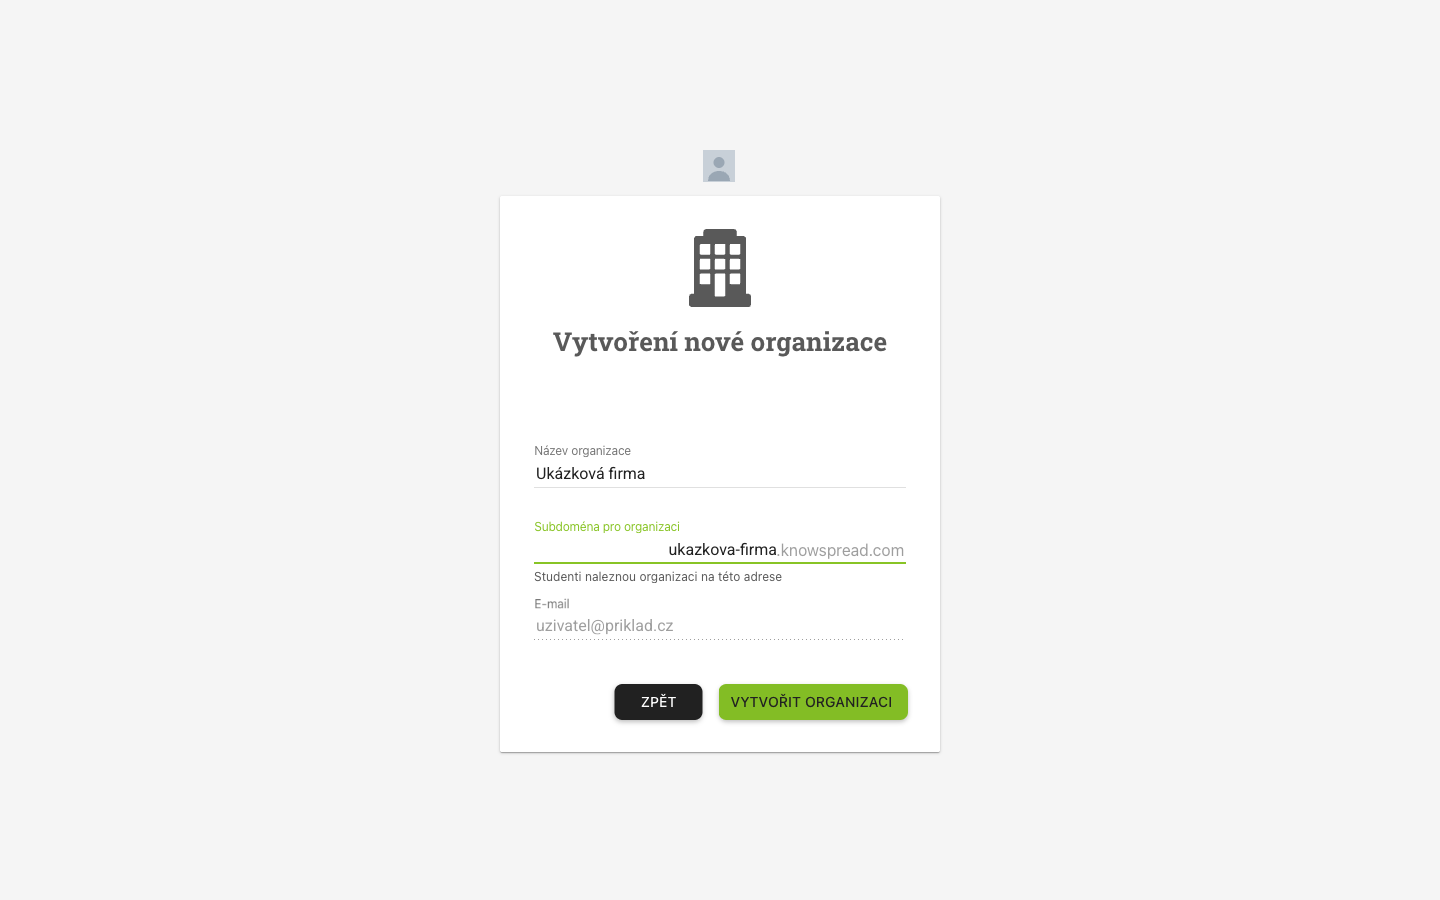
12
- The subdomain builds the address in place, so you see the result before committing to it (1).
- Submitting checks two things separately before it creates anything (2): whether the e-mail is free, and whether the subdomain is taken.
The subdomain cannot be changed from the create form afterwards. General settings shows it as a field, so it is worth choosing as if it were permanent.
3. Land in the new space
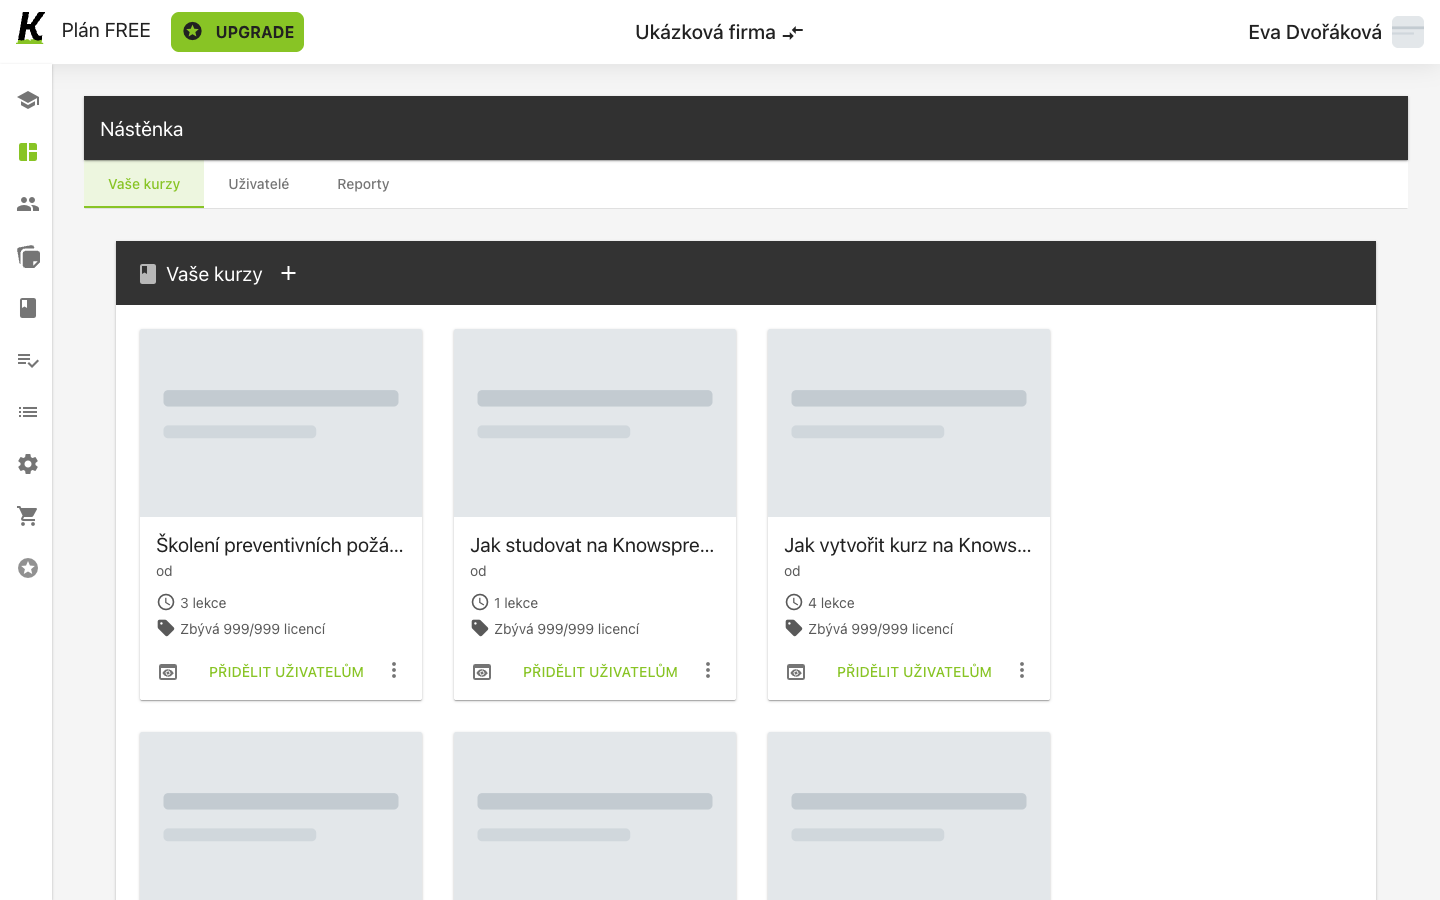
Section titled “3. Land in the new space”Creating the space signs you into it, on its own address.
123
- A new space is on the FREE plan, with an upgrade prompt in the bar (1). That is what puts reports out of reach — see the admin dashboard.
- It is not empty. Knowspread’s own onboarding courses are already there, each with its licences (2).
- Přidělit uživatelům would assign one, except there is nobody to assign it to yet (3).
Where this leaves you
Section titled “Where this leaves you”A space with content and one person in it — you. The starter courses mean you can try assigning before buying anything.
Next: inviting people, and buying content worth assigning.